


This part of the site may become something later on.
For now, follow the “CLUBBANNED!” link to access the clubBANNED! forums.
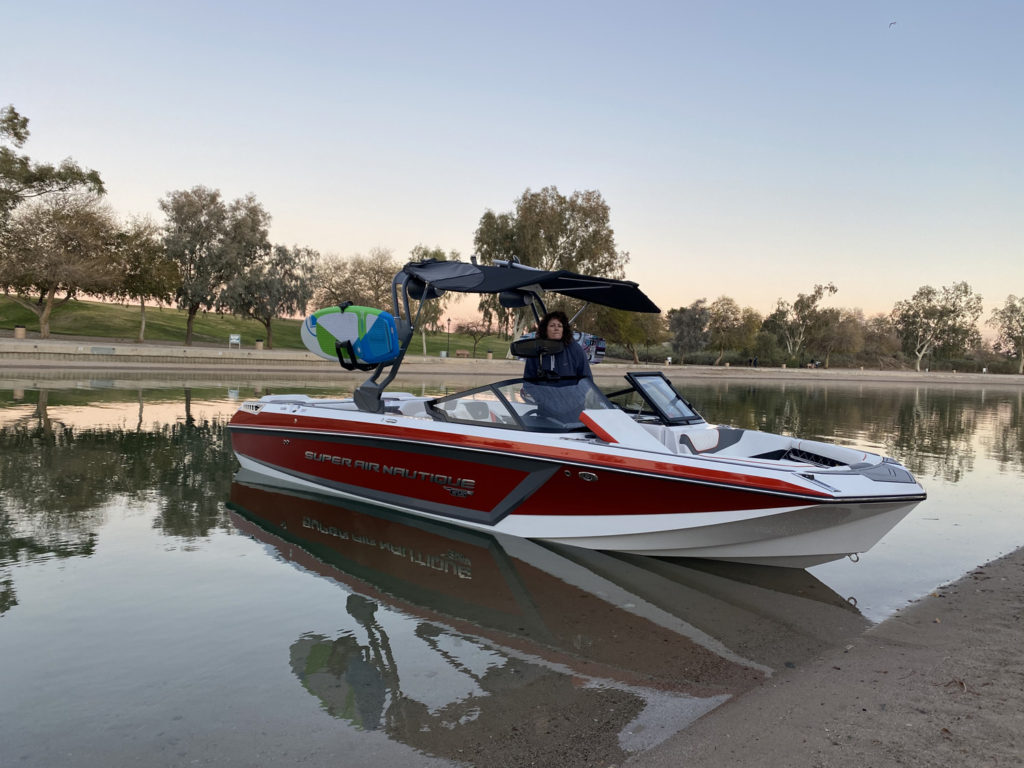
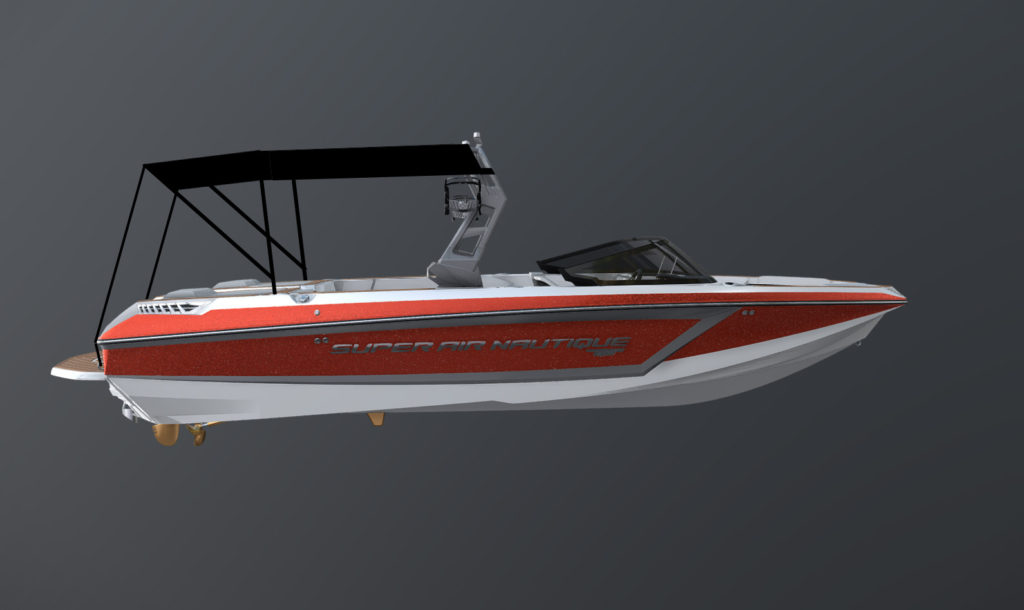
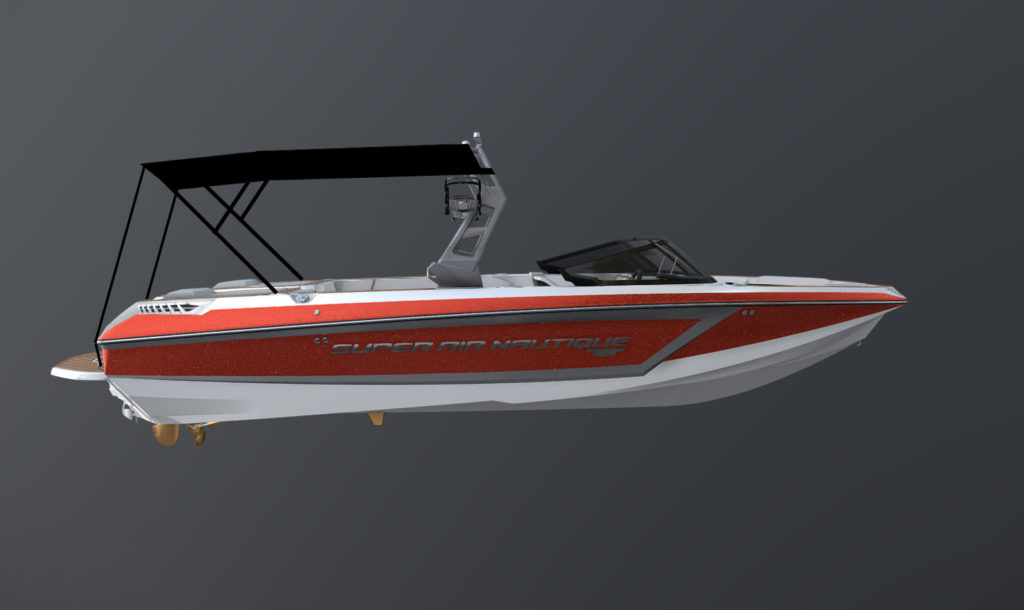
Nautique Rear Bimini
I was hoping to get out to Havasu this past week and finish this project, but “unnecessary travel” has kept me at home. I’ll post what I have now, and finish up with the final pics once the project is completed. The factory bimini on roll-bar boats does a good job or protecting the driver area but little else. There is an aftermarket bimini that extends 12-18″ over the passenger area, but that’s not nearly enough for the Havasu sun. The one thing we loved about pontoons was the huge amount of shade they provide so my goal was to do something similar on this boat. I toyed with the idea of telescoping or making something similar to the factory bimini but hanging of the rear of the tower. After I tossed these ideas around in my head for a few weeks, I decided to go the simple route. Originally the bows were going to made out of carbon fiber and the down tubes telescoping but I am having trouble finding 90º slip joints and will probably have to have them made. For now, it will be standard 7/8″ stainless with telescoping down tubes (if in stitches can get them) to raise and lower the rear of the bimini.
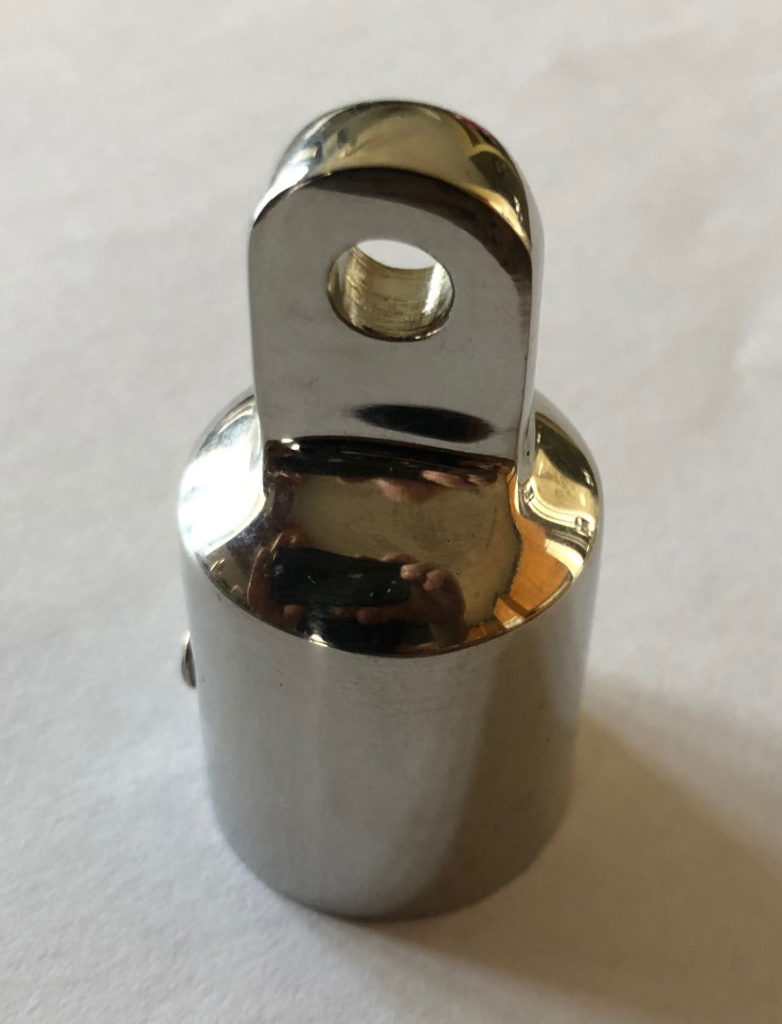
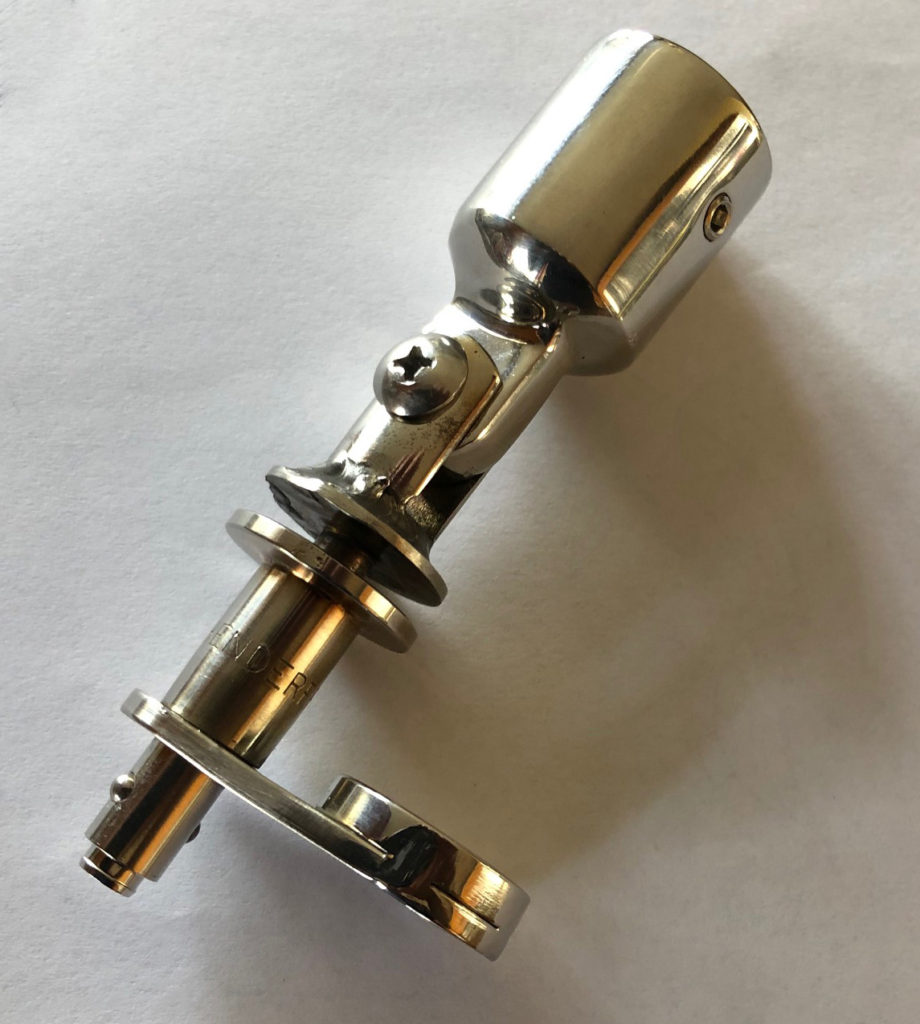
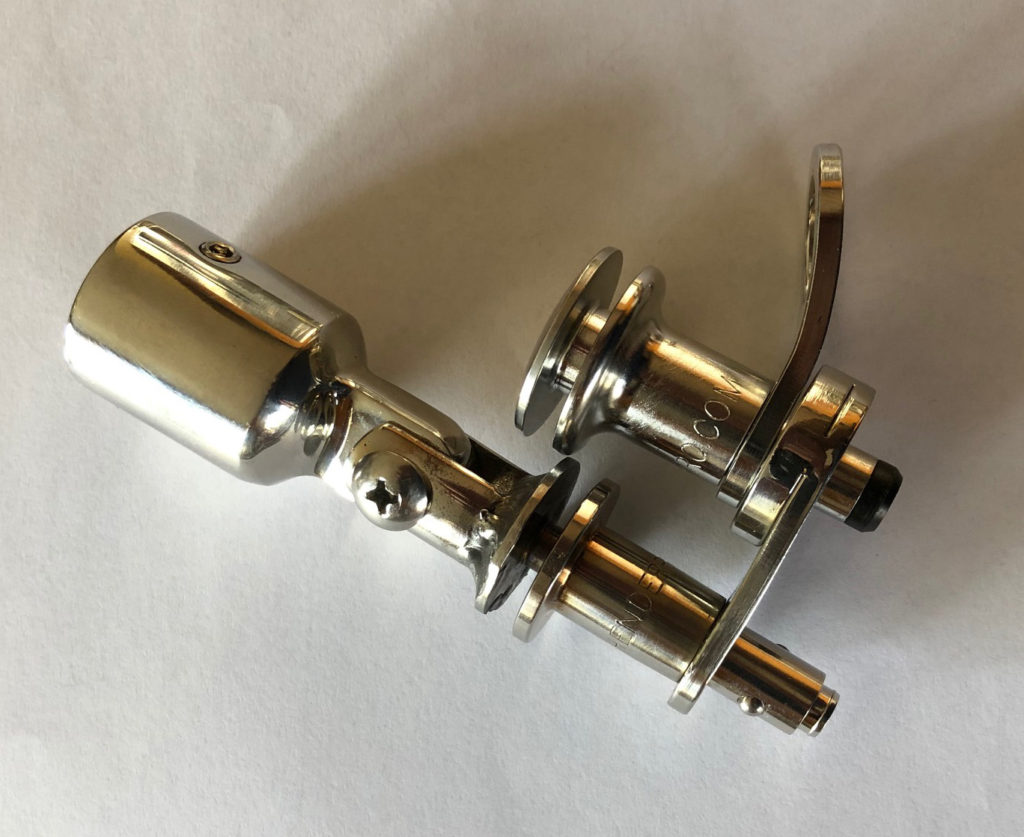
The simplest thing I could think of without drilling or cutting on my wifes brand new boat was to use the Phender Pro mounts that we optioned the boat with. The trick was to make something that could be easily installed/removed while still retaining the Phender Pro mount. I didn’t want the fender out all the time, and I also didn’t wasn’t to lose the use of the rear fenders.
Follow the pics below to see how this will come together.
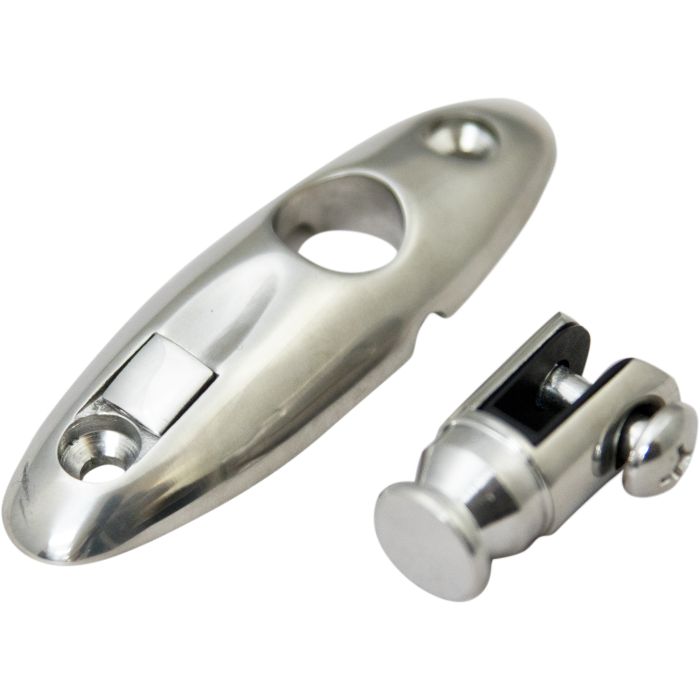
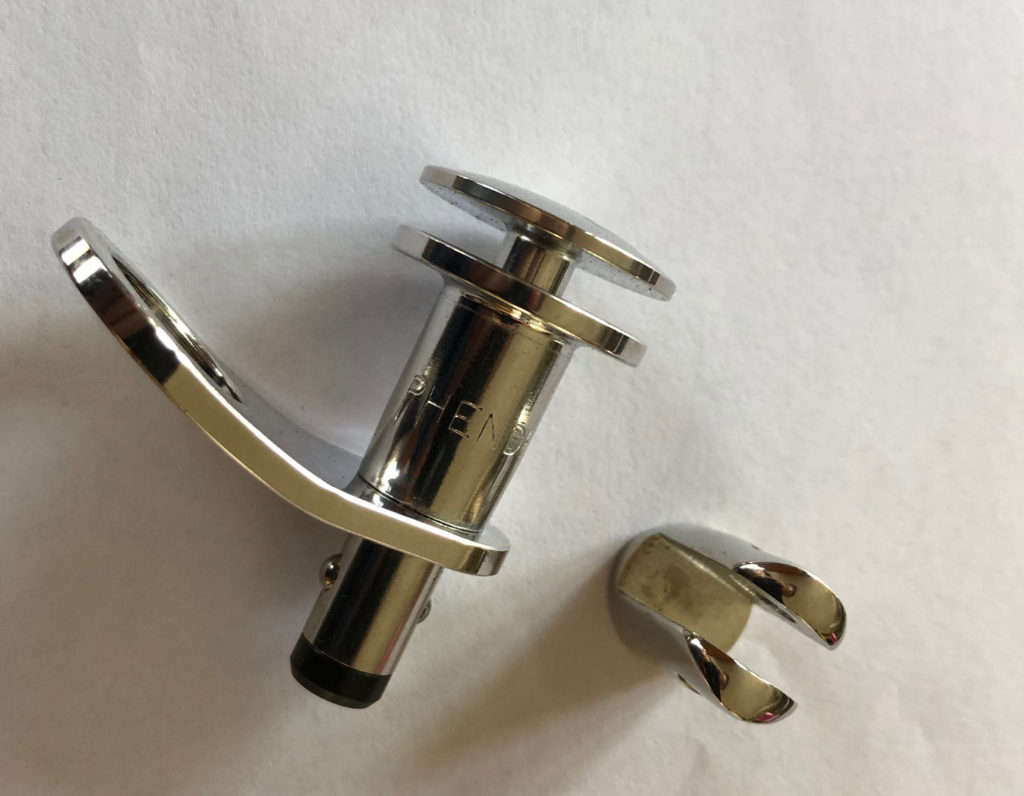
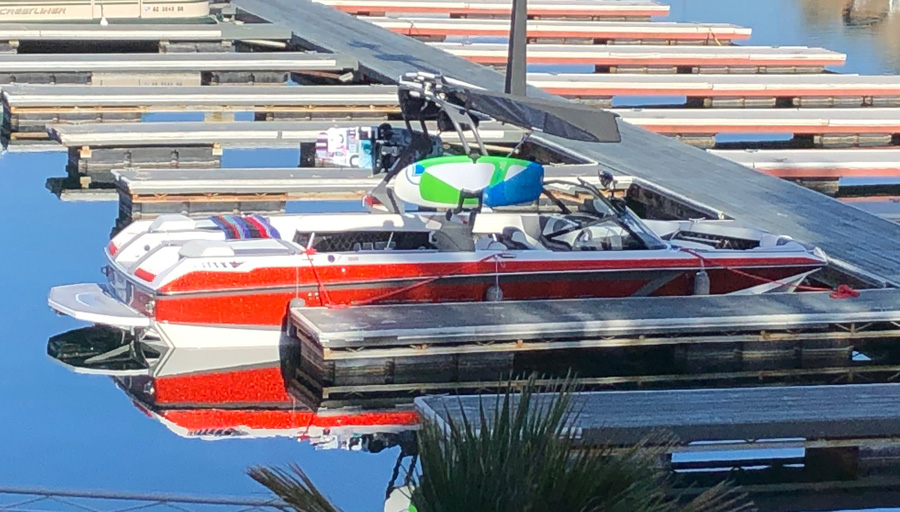
Nautique GS24 Fenders
This is the first tech article for the site. I’m not sure if I will keep them on this page or move them to another area of the site or? For now, I’ll keep it here so it’s easy to find.
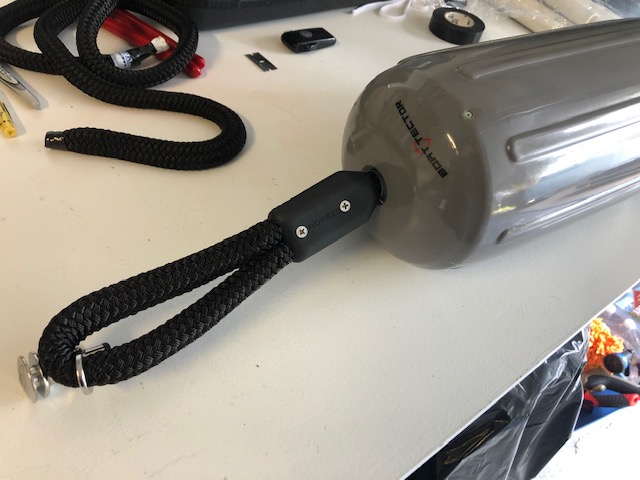
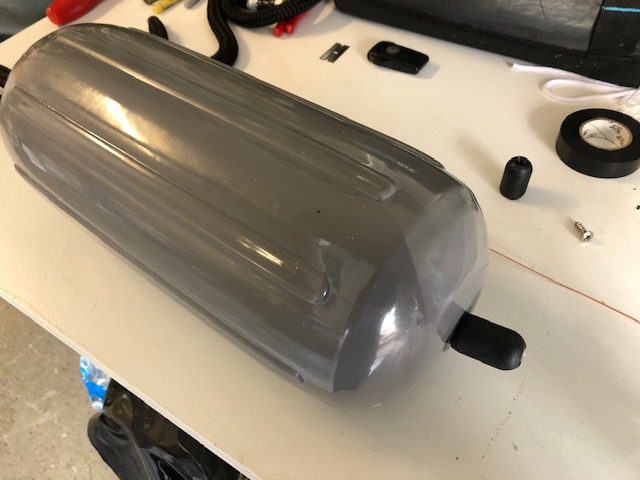
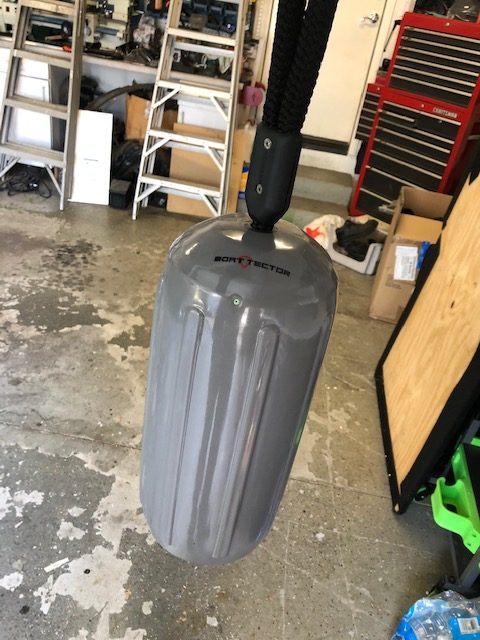
On our last boat, the fenders were attached permanently to the dock lines and you had to pry them through and around the cleats. My wife hated this so we optioned the new boat with something called “Phender Pro”. It’s a stainless quick release pin that you can tie your fenders off to and then its a simple plug in or out of a receptacle mounted in three locations along the gunnel. Having OCD like all boaters, I didn’t want to have ugly knots tying the rope on these things so I scoured the internet and came across a product called “Ropeze”. They make nylon clamps and rope ends in assorted sizes and colors. I choose black 5/8″ because that was the size of the through hole in our fenders and I was hoping that the Ropeze rope end would be big enough and strong enough not to pull through. They are a bit of a pain to asseble (easier with two people), but I think they came out nice looking. It’s a simple matter of stuffing the rope into them and using the screws to clamp it all together while constantly stuffing the rope into the the clamp while tightening. You also need to wrap the rope with electrical tape before cutting, and fusing the end with a heat source (I used a small torch) so the ends don’t unravel and the rope end screw has something to bite into. When we took delivery of the boat, I brought the fenders with us and used some sacrificial rope to get the heights adjusted right for the marine, the springs and a couple of other docks we frequent on the lake. I like the way they came out and think they look better than knots. I wouldnt us them to make dock lines, but they seem like they are more than strong enough for keeping the fender rope together.

Hi, this is a comment.
To get started with moderating, editing, and deleting comments, please visit the Comments screen in the dashboard.
Commenter avatars come from Gravatar.